This past weekend I have been down in the Breacons (South Wales) on our annual family friend get together. We meet up with a load of my parent's friends from CUYHA (Cambridge University Youth Hostel Association), which most of the people they have kept in contact since university were members of. So for the past 11 years a bunkhouse (a building with some beds and cooking facilities) has been rented and everyone has bundled in for a weekend of walking, playing football badly, pontoon (that looks odd when you write it out) and reminicing. Rather dissapointingly this year there were no actual games of pontoon and only one game of football, despite the great pitch we had (meaning it was roughly flat and reasonably sized).
I also did two twenty mile walks in preperation for the hundred mile walk I'm planning to do at the end of the month. My dad did the marshals walk for the 100 (about a month prior to the actual walk a few of the better walkers go round to check the route description is accurate and it isn't too too hard) and said it was one of the easiest walks he'd ever done. While this sounds promising he also said that there was a lot of walking along roads which doesn't appeal to me a lot, walking along a road after 20 miles is bad enough let alone 5 miles after 80 miles of walking.
In other news I will also be finishing my job as a spy at the end of the month and I am planning to head to Canada for a couple of months after I go to Holyrood Palace to get my Duke of Edinburgh's award on the 6th July.
Tuesday, May 02, 2006
Friday, April 21, 2006
GIMPing around
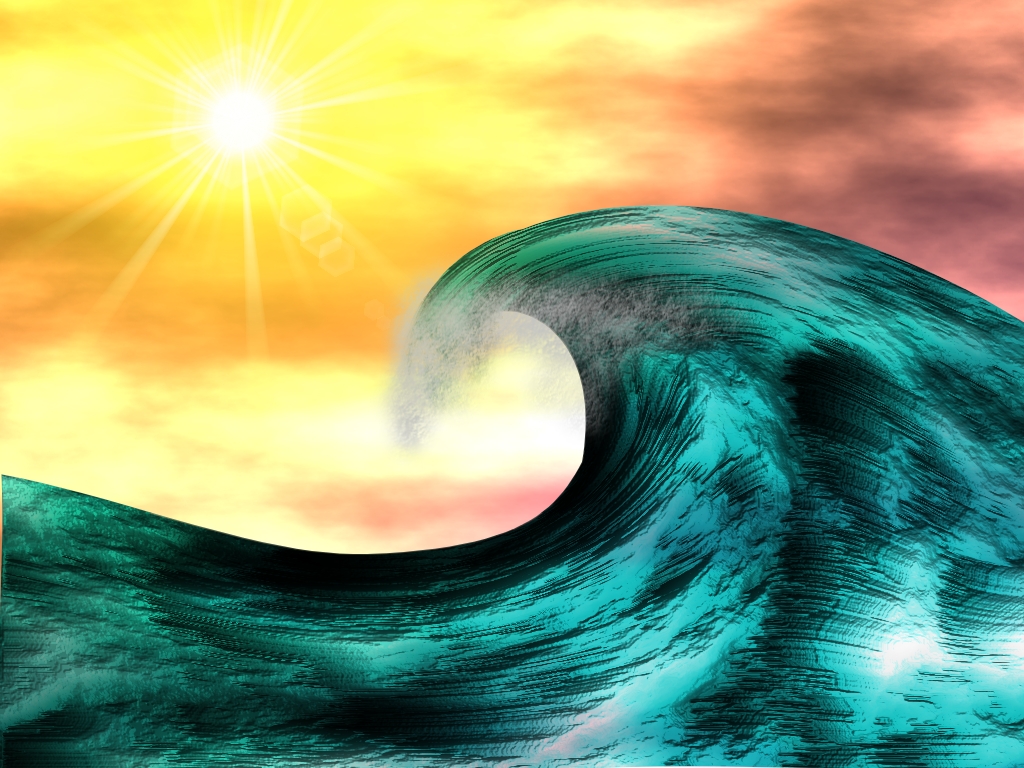
It may seem like cheating a bit to pretty much copy/paste a tutorial I wrote for another site on a wave thing I made using GIMP (google people, don't be too scared of the results), although the end result isn't as good as I missed out several of the tweaks I did.
Anyhow, have a shot, just for sniggles and gits
Note that this is a tutorial for GIMP so you may have trouble following it with Photoshop or any other image editor. And images that are too small to read you can right click and view image for a larger version. Anyhow, here you go:
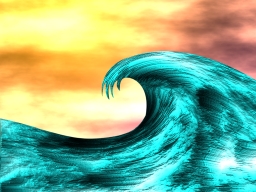
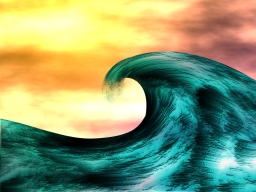
I followed this tutorial for a while, but changed several things to get this:
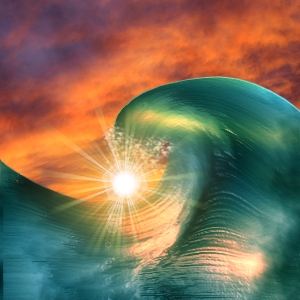
However I have forgotten how I made that and annoyingly the product I got while making this tutorial doesn't look anything like so good but it should be possible to make it look not too bad with a few adjustments.
Hope you enjoy it.
Note I used a 1024x768 canvas but I have scaled the images down.
Sky:
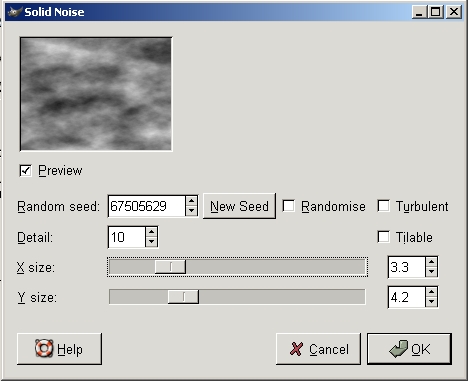
First use Filters>Render>Solid Noise...:
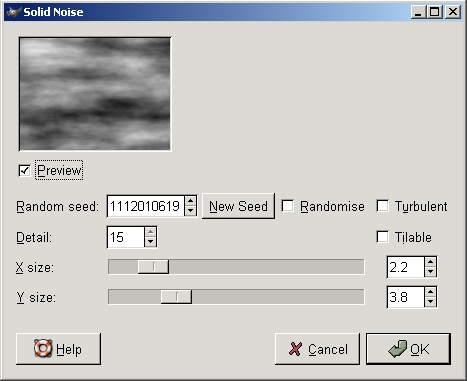
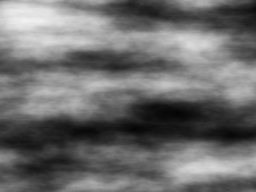
You may want to then adjust the contrast a bit, depending on what your image is looking like, here is what I used:
Then use Filters>Light Effects>Lighting Effects...
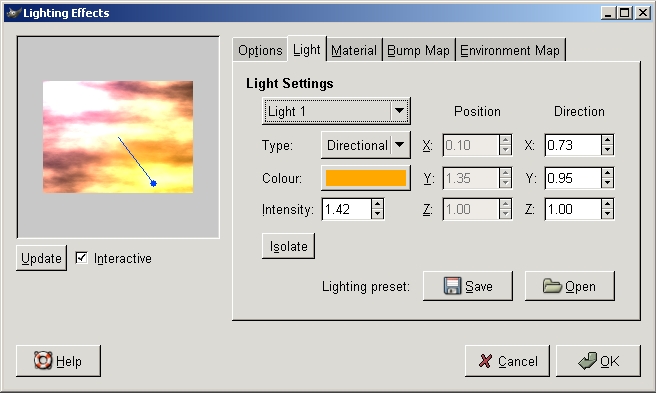
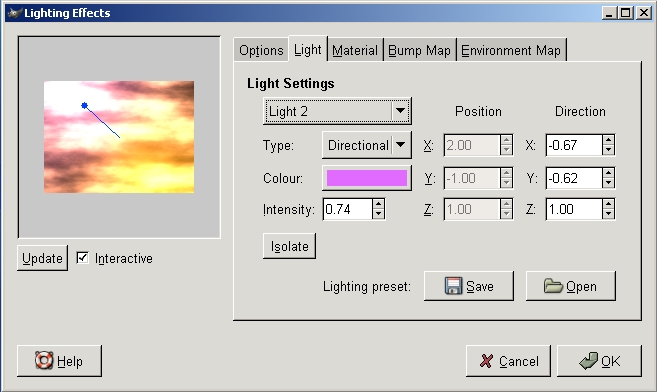
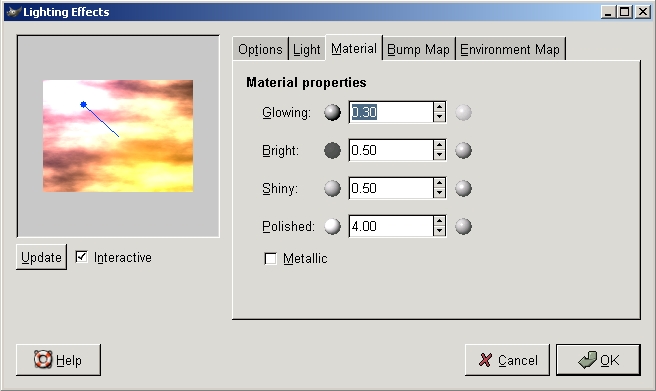
(all options not shown are at their default values)
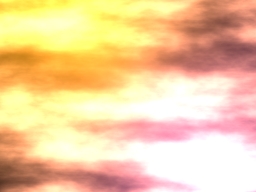
Giving something like this:
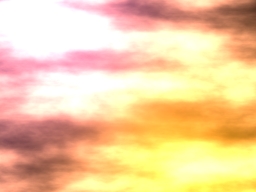
Because of the way the clouds rendered mine is upside down so I reflected it both ways to get it where I wanted:
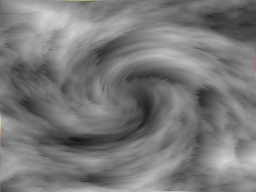
Wave:
Make a new layer on top of that one and use Filters>Render:Solid Noise... again:
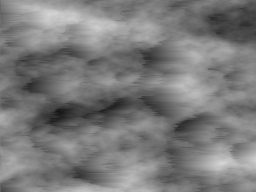
Then Filters>Distorts>Wind...:
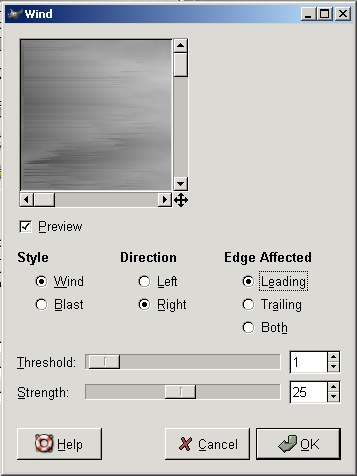
Giving this:
Twirl it using Filters>Distorts>Whirl and Pinch...
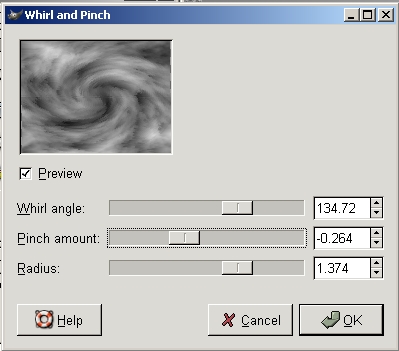
You should get something that looks vaugely like a wave:
Use Paths or the lasso tool and clear a wave shape:
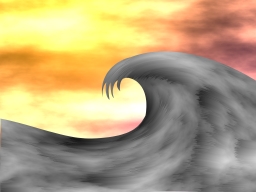
At this point duplicate the layer.
Using the top layer colourise the image (Layer>Colours>Colourise...):
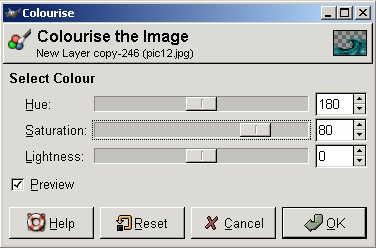
Then you are ready to use Filters>Light Effects>Lighting Effects... again, make sure you enable bump mapping and that it bump maps with the current layer:

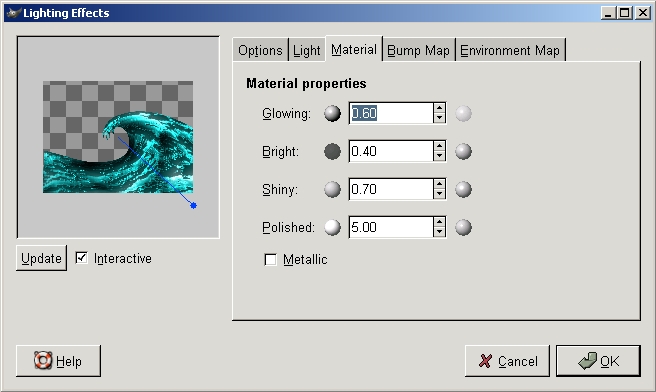
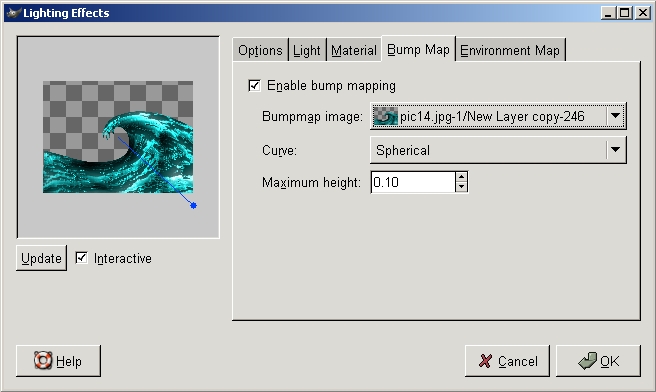
Your wave should look nice and shiny:
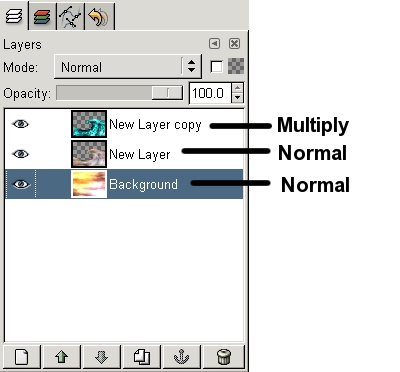
Copy the Background layer (the sky) and place it between the coloured wave andthe grey one, then set the Mode of each layer like below:
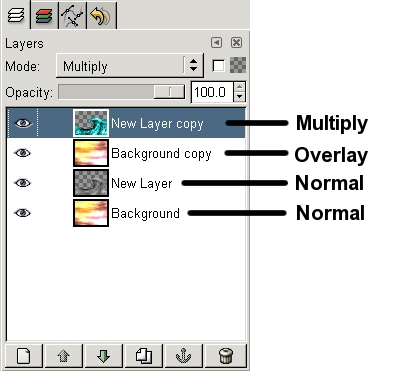
Right click on the top sky layer (the one set to Overlay) and click Merge Down:
Then Merge the top layer down (so you only have one Wave layer)
Use the Eraser on the tip of the wave with some grunge brush, you may want to smudge it a little too:
Then create a New layer and use a grunge brush to paint some spray on the crest of the wave (I found that a reasonably light grey worked better than white):
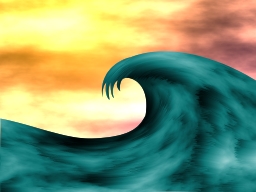
Sun:
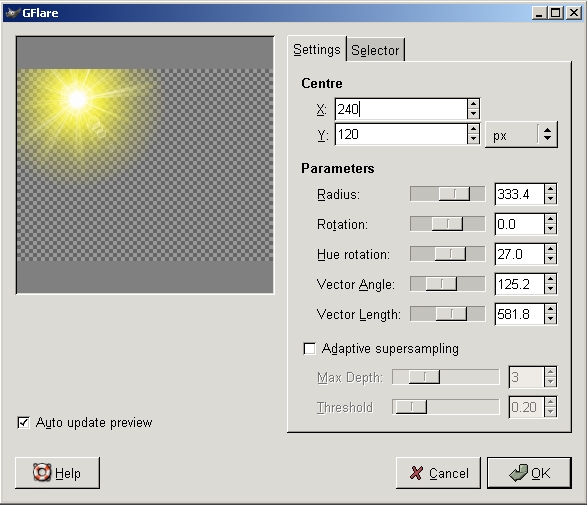
You'll probably want to get this in the right position for the lighting of your wave, thats why we've left it 'til last, anyway use Filters>Light Effects>GFlare... to get a good sun:
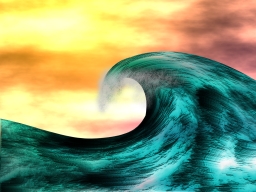
You're done and with any luck you should have something looking considerably better than this:
Anyhow, have a shot, just for sniggles and gits
Note that this is a tutorial for GIMP so you may have trouble following it with Photoshop or any other image editor. And images that are too small to read you can right click and view image for a larger version. Anyhow, here you go:
I followed this tutorial for a while, but changed several things to get this:
However I have forgotten how I made that and annoyingly the product I got while making this tutorial doesn't look anything like so good but it should be possible to make it look not too bad with a few adjustments.
Hope you enjoy it.
Note I used a 1024x768 canvas but I have scaled the images down.
Sky:
First use Filters>Render>Solid Noise...:
You may want to then adjust the contrast a bit, depending on what your image is looking like, here is what I used:
Then use Filters>Light Effects>Lighting Effects...
(all options not shown are at their default values)
Giving something like this:
Because of the way the clouds rendered mine is upside down so I reflected it both ways to get it where I wanted:
Wave:
Make a new layer on top of that one and use Filters>Render:Solid Noise... again:
Then Filters>Distorts>Wind...:
Giving this:
Twirl it using Filters>Distorts>Whirl and Pinch...
You should get something that looks vaugely like a wave:
Use Paths or the lasso tool and clear a wave shape:
At this point duplicate the layer.
Using the top layer colourise the image (Layer>Colours>Colourise...):
Then you are ready to use Filters>Light Effects>Lighting Effects... again, make sure you enable bump mapping and that it bump maps with the current layer:
Your wave should look nice and shiny:
Copy the Background layer (the sky) and place it between the coloured wave andthe grey one, then set the Mode of each layer like below:
Right click on the top sky layer (the one set to Overlay) and click Merge Down:
Then Merge the top layer down (so you only have one Wave layer)
Use the Eraser on the tip of the wave with some grunge brush, you may want to smudge it a little too:
Then create a New layer and use a grunge brush to paint some spray on the crest of the wave (I found that a reasonably light grey worked better than white):
Sun:
You'll probably want to get this in the right position for the lighting of your wave, thats why we've left it 'til last, anyway use Filters>Light Effects>GFlare... to get a good sun:
You're done and with any luck you should have something looking considerably better than this:
Wednesday, April 12, 2006
Just for Jezi
I thought I'd post the original Hitchhiker's Guide to the Galaxy game:
Moved here to save on load time.
Moved here to save on load time.
Friday, March 31, 2006
Au Revoir
Well I failed to post again on Monday and I'm afraid this post will also be a little short.
I'm going off to France Skiing for 9 days this afternoon (something like 15 hour train journey from Leuchars, to London, through the tunnel and across France to Val Thorens. I'm not sure whether there will be any internet access there although I do have my trusty Backtrack Live CD to crack into any wireless networks that may be floating about.
The skiing will hopefully be good, I need to try out my snow-blades more, although for the majority of the time I will be on skis. I've not been there before so I hope the snow is still decent.
For anyone who is interested I've been developing that graphy thing, it is now here (moved from my normal webspace to somewhere that can handle with php). You can now upload a .obj file (can be saved from most 3d modelling programs) and view it in wire frame, sudo-render or a combination of the two.
Well until Mondey after next Au Revoir
Thursday, March 09, 2006
Too Much time on my hands....
...
That was Keir's comment when I showed him something I had been working on over the last week. Inspired by Canvascape by Benjamin Joffe I have had a go at deeloping a 3d graph plotter using Javascript and the new canvas tags. It is in no way finished but you can look at what I've done here. Currently you have to move the graph about using the boxes below (note that instead of clicking loads you can click once and then hold down enter), I am currently working on mouse support. Then I'll probably have a look at rendering surfaces.
You also need to have a browser which supports the canvas tags (currently Firefox 1.5, Opera 9 and Safari 1.3 I believe)
This is also vaugely related to some work my mum is doing on e-learning but I'm not sure whether it will get used or not.
Oh, and apparently theres some javascript you can't put on you blog.
In other news: I went for a nice walk at the weekend, 23 miles up and down hills in the North of England in the snow.
Subscribe to:
Posts (Atom)

